Key Takeaways
- Neck pain affects an estimated 203 million people worldwide, and it’s one of the most common reasons people try inversion therapy at home.
- Used correctly, a 20-30 degree tilt for a few minutes at a time is enough to feel spinal traction; you don’t need to go fully upside down.
- Inversion tables aren’t for everyone. People with high blood pressure, glaucoma, heart disease, or who are pregnant should talk to a doctor first.
- Evidence for inversion therapy is still mixed, so treat it as one part of a broader neck-pain routine, not a standalone cure.
Introduction
A stiff neck from a car accident, a long day hunched over a laptop, or an awkward night’s sleep can derail your whole week. Neck pain is genuinely common: global health data puts the number of people living with it at roughly 203 million worldwide, with rates highest among adults between 45 and 74. There are plenty of ways to chase relief, from heat and massage to over-the-counter pain relievers, but one method keeps coming up in physical therapy circles: the inversion table.
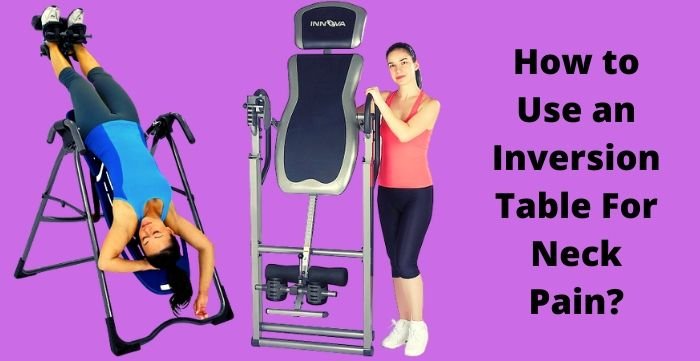
An inversion table is a piece of equipment built for inversion therapy, a technique where you tilt your body so your head sits lower than your heart. The idea is simple: let gravity do in reverse what it does to your spine all day long. Every time you sit, stand, or walk, gravity is quietly compressing your spine; inversion is meant to give it a break, at least temporarily. The best inversion tables are designed to make this safe and repeatable at home. This guide walks through exactly how to use one for neck pain, what the research actually says, and who should skip it altogether.

How does an inversion table work for neck pain?
One common driver of neck pain is cervical spinal stenosis, a narrowing of the spinal canal in the neck that presses on nearby nerves and soft tissue. That pressure doesn’t always stay put either; it can radiate down into your shoulders and upper back.
When you invert, gravity pulls in the opposite direction it usually does. Instead of compressing your vertebrae, it gently separates them, which is why the effect is often described as spinal decompression or traction. That small amount of space can ease pressure on compressed discs and nerve roots, encourage blood flow to the area, and give overworked neck muscles a break from constant tension. Practitioners also point to more even distribution of spinal fluid as part of why people report feeling looser afterward.
Cervical traction works a bit differently than lumbar traction. The neck carries less body weight than the lower back, so even a mild 20 to 30 degree tilt can create noticeable separation between the vertebrae. Physical therapists sometimes recommend inversion as a passive alternative to manual cervical traction devices, since it uses your own body weight instead of a mechanical pull.
Does the research actually support inversion therapy?
Here’s the honest answer: the evidence is mixed, and any reputable source will tell you the same. WebMD notes that some people get short-term relief from compressed-disc pain, but it’s unlikely to be an effective long-term fix on its own, and studies have found it performs no better than sham treatment for some conditions. The Cleveland Clinic echoes that caution: doctors interviewed there describe the research as genuinely mixed, with small studies showing benefit for some patients and none for others.
That doesn’t mean inversion tables are useless. It means they work best as one tool in a bigger routine, alongside things like posture correction, targeted stretching, and guidance from a physical therapist, rather than a stand-alone treatment you expect to fix everything in a week.
Benefits of an inversion table for neck pain
When used correctly and consistently, people who invert regularly report several benefits:
- Encourages the spine to realign more naturally over time
- Increases flexibility and range of motion in the neck and upper back
- May help rehydrate spinal discs and support their cushioning effect
- Strengthens supporting ligaments and muscles around the neck
- Improves posture, especially for people who sit at a desk most of the day
- Reduces compression on the cervical vertebrae
- Provides short-term relief from tension-related spinal pain
These benefits mostly come from user-reported outcomes and small studies rather than large trials, so results vary. Postural and flexibility gains tend to show up faster than any lasting change to disc height, which is why consistency over weeks matters more than any single session.
Who should avoid using an inversion table
Inversion isn’t right for every body, and skipping this section is where most injuries happen. Talk to your doctor before you invert if you have, or have a history of, any of the following:
- High blood pressure or heart disease (inversion raises heart rate and blood pressure)
- Glaucoma or a history of retinal detachment
- Stroke history or circulation disorders
- A hiatal hernia
- Osteoporosis or fragile, unstable bones
- Pregnancy
- An inner ear condition that affects balance
If none of those apply to you, you’re still better off getting a quick sign-off from a physician, particularly if your neck pain followed a car accident or fall. For a closer look at how often it’s safe to invert once you’re cleared, see our guide on how many times a day you should use an inversion table.
How to use an inversion table for neck pain, step by step
An inversion table only helps if you use it correctly. Rush the setup or skip a safety step, and you’re more likely to end up with dizziness or a new injury than pain relief. Follow these seven steps in order.
Step one: Consult your doctor
Before you invert for the first time, check in with a physician, ideally one familiar with your neck injury. They can flag any of the contraindications above, help you set a safe starting angle, and build a routine around your specific diagnosis rather than a generic one you found online.
Step two: Read the instruction manual
Every inversion table is a little different. The manual will tell you the maximum weight it supports, how the ankle locks work, and how the frame is meant to be assembled. Skimming this step is how people end up with a table that isn’t actually locked into place once they’re upside down.
Step three: Set the table correctly
Assemble the table exactly as the manual describes, and double-check every bolt and locking pin before you trust it with your body weight. Set it up on a flat, uncluttered floor with enough clearance above and around it. Because your head ends up lower than your heart, a mistake here isn’t just uncomfortable, it can be genuinely dangerous.
Step four: Put on supportive shoes
Skip bare feet or socks. Sports shoes with a firm sole grip the ankle rests better and reduce the chance of your feet slipping once you’re inverted, which keeps the whole experience safer and more comfortable.

Step five: Step on and lock your body in place
With shoes on, step onto the table’s footrests, pull up the ankle lever, and lock your ankles securely. Fasten the safety strap across your body like a seatbelt. Take a moment to confirm every lock and strap is engaged before you tilt back even slightly.
Step six: Invert gradually
Start small, around 20 to 30 degrees, rather than going straight to a full inversion. Let your body adjust for about two minutes before going further if you choose to. While inverted, gently and slowly move your neck side to side, and let your arms rest above your head to encourage traction through the cervical spine. Most people find 3 to 5 minutes at a comfortable angle is plenty; there’s no need to push past what feels manageable.
Step seven: Return upright slowly
Reverse the process gradually rather than snapping back up. Coming back to vertical should take at least two minutes so your blood pressure and inner ear have time to adjust; standing up too fast is one of the most common causes of dizziness after inverting. Once you’re upright, unlock the ankle rests and safety strap before stepping off.
Common mistakes that turn relief into a setback
Most bad experiences trace back to a handful of avoidable mistakes, not the equipment itself.
- Going too far, too fast. Jumping to a steep angle on day one is the top cause of dizziness and soreness.
- Skipping the ankle lock check. A loose ankle lock is a leading cause of falls.
- Inverting on a full stomach. Eating right before inverting can trigger nausea; wait at least an hour.
- Standing up too quickly. This is the fastest way to trigger lightheadedness.
- Treating it as a substitute for medical care. It can complement treatment, but it isn’t a diagnosis if your pain is severe, persistent, or follows an injury.
Watch: a physical therapist’s guide to safe inversion table use
If you’d rather see the setup and inversion process in action before trying it yourself, this walkthrough from physical therapists Bob and Brad covers the same safety fundamentals in more detail.
Getting the best results without overdoing it
Consistency beats intensity here. A short daily session, five minutes, once or twice a day, tends to produce better long-term results than one long, aggressive session that leaves you sore or dizzy. Build up your angle gradually over several sessions rather than chasing a full inversion on day one. If you’re not sure how often is appropriate for your situation, our breakdown of how often to use an inversion table covers frequency in more detail, and it’s worth pairing inversion with the fundamentals your doctor or physical therapist already recommends: gentle neck stretches, posture correction at your desk, and, if needed, supportive gear like a neck brace for sleeping while you recover.
Frequently asked questions
How long should I stay inverted for neck pain?
Most people find 3 to 5 minutes at a comfortable angle is enough to feel traction without overdoing it. New users should start with less time at a shallow angle and build up gradually over several sessions.
Can an inversion table make neck pain worse?
It can, if you skip the safety steps: inverting too far too fast, standing up too quickly, or using the table with an untreated condition like high blood pressure or a herniated disc without medical guidance. That’s why the setup and consultation steps above matter as much as the inversion itself. If you feel sharp pain, numbness, or tingling, stop and return to vertical right away rather than pushing through it.
How is this different from using an inversion table for a herniated or bulging disc?
The mechanics are similar, spinal decompression through gravity, but the target area and starting angle differ. If that’s your specific diagnosis, see our dedicated guides on using an inversion table for a herniated disc.
Do I need a specific type of inversion table for neck pain?
Any table with secure ankle locks, a sturdy frame, and an adjustable angle will work. If you’re shopping around, our inversion table reviews and buyer’s guide and Body Power inversion table review compare specific models.
Should I invert every day?
Many people invert once or twice daily once they’re comfortable with the routine, but there’s no need to rush there. Give your body a few sessions to adjust to the sensation of being inverted before making it a daily habit, and back off if you notice any dizziness, headache, or increased pain afterward.
In conclusion
Used with the right precautions, an inversion table can be a useful part of a neck pain routine, easing pressure on compressed discs, loosening tight muscles, and giving your spine a genuine break from gravity. Just don’t treat it as a guaranteed fix: the research is still mixed, certain health conditions rule it out entirely, and how you use the table matters more than how often. Check with your doctor first, follow the setup steps above, and aim for short, consistent sessions rather than long, aggressive ones.

Hi, I’m Mamon, the content creator behind this blog. I share my experience in blogging, WordPress, SEO, and affiliate marketing through honest product reviews, in-depth buying guides, and practical how-to articles. Every piece of content is thoroughly researched and written to help readers make informed decisions.
Leave a Reply