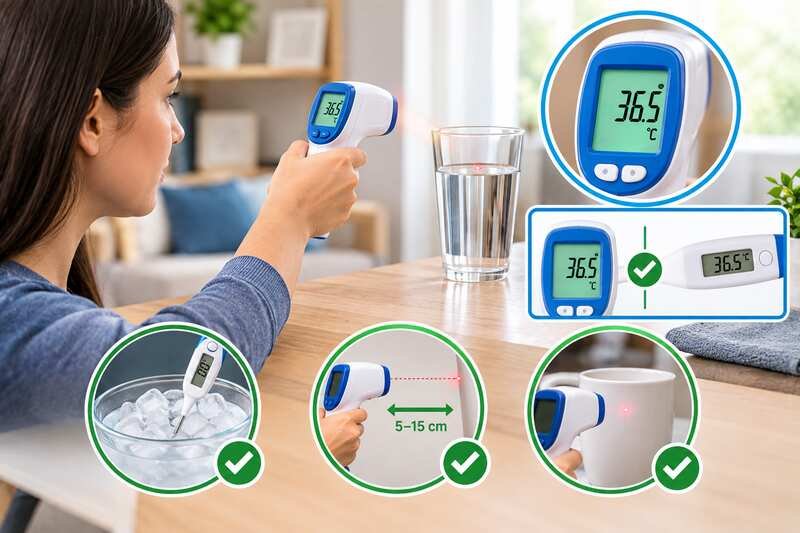
Infrared thermometers are key in many fields, like medicine and industry. Because of this, it’s vital to know how to check accuracy of infrared thermometer readings for reliable temperature measurements. In fact, these devices use infrared light to measure the heat from objects, giving fast and easy temperature results. So, this guide walks you through how to check accuracy of infrared thermometer readings using simple, proven methods.
The COVID-19 pandemic made infrared thermometers even more important for everyday screening. As a result, they are used for health checks and in industries, and the FDA’s guidance on non-contact infrared thermometers outlines how these devices should be positioned and used for accurate screening. Therefore, making sure they work right is key to getting accurate results.
Calibrating an infrared thermometer is important for its accuracy. For example, many calibration equipment makers produce blackbody sources and adjustable-emissivity models that let users check temperatures with more confidence.
Key Takeaways
- Infrared thermometers must meet strict accuracy standards
- Calibration is essential for reliable temperature measurements
- Different applications require varying levels of precision
- Temperature screening requires careful device verification
- Regular accuracy checks prevent measurement errors
Understanding Infrared Thermometer Technology
Infrared thermometers are a big step forward in measuring temperature without touching. They are very useful in many fields because of this. For instance, you can check the temperature of objects without direct contact.
It’s important to know how these devices work to get accurate readings. Specifically, they use special technology to detect the heat given off by objects. Ultimately, this is done through advanced optics.
How Infrared Thermometers Measure Temperature
First, these devices have a few main steps to measure temperature:
- Detecting infrared radiation emitted by an object
- Focusing thermal energy through specialized optics
- Converting radiation signals into electrical signals
- Processing electrical signals to generate temperature readings
Key Components of IR Thermometers
Specifically, modern infrared thermometers have important parts for accurate readings:
| Component | Function |
|---|---|
| Optical System | Collects and focuses infrared radiation |
| Detector | Converts infrared energy into electrical signals |
| Signal Processor | Calculates temperature based on detected signals |
| Display | Shows temperature readings |
The Role of Thermal Energy Detection
Thermal energy detection is key to infrared thermometry. Specifically, these devices measure the invisible infrared radiation from all objects above absolute zero, then turn this energy into precise temperature readings.
Essential Preparation Steps for Checking Infrared Thermometer Accuracy
Knowing how to check accuracy of infrared thermometer devices starts with proper preparation. First, getting your infrared thermometer ready is key to its accuracy. In other words, quality control starts before you even use it. Therefore, you need to set up the right conditions for precise temperature readings.
- Let the thermometer adjust to room temperature for 20-30 minutes
- Use a soft cotton swab and isopropyl alcohol to clean the lens or sensor
- Make sure there’s no debris or moisture that could affect readings
- Check the battery to keep it powered up during testing
Skipping this preparation is one of the most common reasons readings drift from the true temperature.
The environment plays a big role in infrared thermometer reliability. For example, keeping the room temperature steady is essential. Specifically, most experts suggest a temperature range of 68-72°F for testing, and the FDA notes that non-contact infrared thermometers should be used in a draft-free space away from direct sun or radiant heat sources.
When cleaning the sensor, be gentle. For instance, a soft touch with a lint-free swab is best. Also, avoid too much pressure to prevent damage. Finally, always check the manufacturer’s cleaning instructions for your device.
Every step in preparation helps ensure accurate temperature readings. Indeed, this is true for many fields, from food service to industrial settings.
How to Check Accuracy of Infrared Thermometer Readings
Checking the accuracy of an infrared thermometer is key. Specifically, it involves several steps to ensure reliable temperature readings. As a result, this is important for different situations, whether you are screening in a clinic or checking food surface temperatures in a kitchen.
Room Temperature Acclimation Method
First, prepare your thermometer well. In fact, it takes 15 to 20 minutes to adjust when moved between environments. Ideally, aim for a room temperature of 22°C (72°F) during testing.
- Maintain consistent room temperature
- Allow thermometer to adjust for 15-20 minutes
- Ensure no direct heat sources nearby
Ice Water Testing Procedure
The ice water test is a reliable, low-cost way to check your thermometer at a known reference point. To begin, make an ice bath by filling a glass with ice and a little water.
- Fill glass with ice
- Add minimal water
- Stir and let settle for one minute
- Hold thermometer 3 inches above at 90-degree angle
- Check for reading of 32.0°F (0°C)
Distance-to-Target Ratio Considerations
Knowing your thermometer’s distance-to-target ratio is important when learning how to check accuracy of infrared thermometer readings correctly. For example, a 12:1 ratio means you measure a 1-inch area at 12 inches.
| Distance Ratio | Measurement Area | Accuracy Impact |
|---|---|---|
| 12:1 | 1-inch diameter at 12 inches | High precision |
| 8:1 | 1-inch diameter at 8 inches | Moderate precision |
| 16:1 | 1-inch diameter at 16 inches | Extended range precision |
Accuracy depends as much on technique as on the device itself. Follow these steps and you can be confident your infrared thermometer is giving accurate readings.
Understanding Emissivity Settings and Their Impact
Emissivity is key to making sure your infrared thermometer is accurate. Specifically, it shows how well an object sends out heat compared to a perfect black body. As a result, knowing about emissivity helps you get more accurate temperature readings.

Different materials have their own emissivity values. In fact, these values can greatly affect the temperature readings. For example, most non-metallic surfaces have an emissivity close to 0.95. As a result, this is often the default setting for many infrared thermometers.
Emissivity Values for Common Materials
| Material | Emissivity Coefficient |
|---|---|
| Human Skin | 0.98 |
| Water | 0.95-0.98 |
| Concrete | 0.85-0.94 |
| Polished Chrome | 0.05 |
When using an infrared thermometer, adjust the emissivity setting for your target material. Additionally, most advanced IR thermometers let you adjust emissivity for better precision.
- Check your device’s manual for specific emissivity adjustment instructions
- Use the default 0.95 setting for most non-metallic surfaces
- For highly reflective surfaces, manually adjust the emissivity
Understanding and using emissivity settings correctly directly improves how to check accuracy of infrared thermometer readings against a known reference.
Calibration Methods Using Blackbody Sources
Infrared thermometer calibration is key to ensuring your tools work right. As a result, it keeps the best infrared thermometers accurate over different temperatures.

Blackbody sources are vital for calibrating infrared thermometers, since they radiate efficiently at a known, stable temperature, making them a solid reference for accuracy checks.
Laboratory Calibration Techniques
Professional labs use top-notch methods for calibration. Specifically, the main steps are:
- Using blackbody calibrators with high, consistent radiation efficiency
- Verifying temperature accuracy across multiple reference points
- Adjusting emissivity settings for precise measurements
Professional Calibration Services
In particular, getting a professional calibration service has many benefits:
- Traceability to national standards like NIST
- Compliance with industry quality standards
- Detailed documentation of calibration processes
Temperature Range Verification
Calibrating infrared thermometers right means testing their range across the values you actually use. For example, here’s what’s common:
| Temperature Range | Calibration Method | Accuracy Level |
|---|---|---|
| 0°C to 500°C | Flat-plate Calibrator | ±1% accuracy |
| Above 500°C | Cavity-type Blackbody | ±0.5% accuracy |
It’s smart to recalibrate your infrared thermometer every year. Doing so keeps your readings accurate and your temperature tools reliable over the long run.
Common Factors Affecting Infrared Thermometer Accuracy
Infrared thermometer reliability comes from knowing what affects non-contact temperature readings. Specifically, many environmental and technical factors can change how accurate your readings are.

- Ambient temperature changes
- Surface emissivity
- Measurement distance and angle
- Target surface properties
- Environmental interference
When checking non-contact temperature measurements, look at a few key things:
- Wavelength sensitivity (8-14 µm range recommended)
- Perpendicular measurement angles
- Lens cleanliness
- Instrument acclimatization time
Environmental challenges can lead to big measurement errors. For instance, air pollutants, electromagnetic interference, and temperature changes around you can affect readings a lot. In fact, ASTM E1965-98, the standard referenced in FDA guidance for clinical infrared thermometers, sets laboratory and clinical accuracy limits that manufacturers must disclose.
To get reliable measurements, let your infrared thermometer adjust to new temperatures for 20-30 minutes. Additionally, keep it clean, avoid electromagnetic interference, and always use the right distance-to-spot ratio for best results.
How to Check Infrared Thermometer Accuracy Using Reference Thermometers
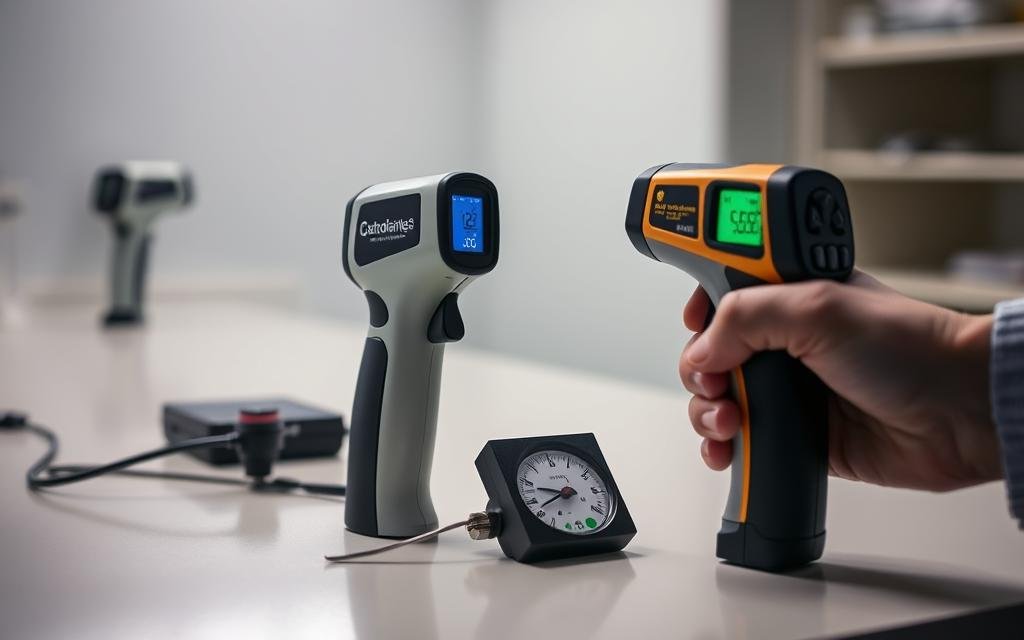
To check if your infrared thermometer is working right, compare its readings with those from reliable reference thermometers. This is a practical answer to how to check accuracy of infrared thermometer devices without sending them out for lab testing.
Thermocouple Comparison Method
The thermocouple comparison method is a solid way to check if your infrared thermometer is accurate. Specifically, here’s what you need to do:
- Choose a high-quality thermocouple that’s been well-calibrated
- Make sure the surfaces you’re measuring have the same emissivity
- Take readings from the same spot at the same time with both devices
Secondary IR Thermometer Verification
Using more than one infrared thermometer can help confirm your temperature readings. To do this, follow these steps:
- Have two infrared thermometers that are both calibrated
- Measure the same thing at the same time with both
- Look at how the temperatures match up
| Verification Method | Typical Agreement | Recommended Frequency |
|---|---|---|
| Thermocouple Comparison | Within about ±0.3°C (±0.5°F) | Quarterly |
| Secondary IR Thermometer | Within about ±0.2°C (±0.4°F) | Monthly |
Documentation and Record Keeping
Keeping detailed records is important for tracking your infrared thermometer’s performance over time. Specifically, make a log that includes:
- Calibration dates
- Results of comparisons
- Details about the environment
Consistent verification and documentation matter most when the readings will support a food safety, clinical, or industrial decision.
Conclusion
It’s important to know how to check accuracy of infrared thermometer devices. Indeed, this is true for many fields, like medicine and industry. Overall, by learning about calibration and how to avoid errors, you can make sure your thermometer works well.
Testing your thermometer regularly is key: use ice baths and compare it to other thermometers. ASTM standards and the FDA’s guidance on non-contact devices both point to the same idea: accuracy has to be checked and documented, not assumed.
Getting your thermometer professionally calibrated is the best way to be sure, since calibration certificates from places like NIST show its accuracy against a traceable reference. If you are still getting familiar with the basics, our guide on how to use an infrared thermometer covers proper technique step by step.
By following this guide, you’ll know how to check accuracy of infrared thermometer readings and keep your device trustworthy over time. Always check your thermometer and follow the maker’s instructions. Ultimately, you can always trust your temperature readings.
FAQ
Basics and Accuracy
Q1: How do infrared thermometers work?
A: Infrared thermometers detect heat from an object’s surface. Specifically, they use special optics and sensors to turn this heat into an electrical signal. As a result, this signal shows the object’s temperature without touching it.
Q2: Why is accuracy important when using an infrared thermometer?
A: Accuracy is key because small mistakes can cause big problems. This is true in food safety, industrial processes, medical screenings, and science. For instance, wrong readings can lead to health risks or expensive mistakes.
Q3: How often should I check the accuracy of my infrared thermometer?
A: Check your thermometer’s accuracy every six months or before important measurements. If you work in healthcare, food service, or manufacturing, you might need to calibrate it more often.
Q4: What is emissivity, and why does it matter?
A: Emissivity shows how well a material sends out infrared energy. Specifically, different materials have different values. Therefore, knowing and adjusting for emissivity helps get accurate temperature readings.
Q5: Can environmental factors affect infrared thermometer accuracy?
A: Yes, things like humidity, air temperature, dust, and smoke can change readings. Also, distance, surface reflectivity, and the environment around you can affect accuracy.
Usage, Care, and Verification
Q6: What are the most reliable methods for checking infrared thermometer accuracy?
A: Reliable methods include ice water testing, room temperature acclimation, comparing with a reference thermometer, and professional calibration. Specifically, each method works best for different needs.
Q7: Do I need professional calibration for my infrared thermometer?
A: Professional calibration is best for precise needs like lab research, medical diagnostics, or quality control. However, for less precise uses, regular self-calibration can work well.
Q8: How do I clean and maintain my infrared thermometer?
A: Clean the lens with a soft cloth or special solution. Also, avoid touching the lens. Then, store it in a case and keep it away from extreme temperatures and humidity. Finally, follow the manufacturer’s care tips.
Q9: What is the typical accuracy range for infrared thermometers?
A: Most thermometers are accurate to within about ±1°C to ±2°C (±1.5°F to ±2°F) of the true temperature. However, high-end models can be even more precise for specific uses.
Q10: Can I use an infrared thermometer on all surfaces?
A: No, not all surfaces work well with infrared thermometers. For example, shiny, transparent, or reflective surfaces might need special care or calibration for accurate readings.
For a device built specifically for forehead readings, see our guide on how to use the Sejoy infrared forehead thermometer for model-specific tips.

Hi, I’m Mamon, the content creator behind this blog. I share my experience in blogging, WordPress, SEO, and affiliate marketing through honest product reviews, in-depth buying guides, and practical how-to articles. Every piece of content is thoroughly researched and written to help readers make informed decisions.
Leave a Reply