

If you’re wondering how long does it take to distill water at home, the honest answer depends heavily on which method you use. A simple stovetop setup and a dedicated countertop distiller produce very different timelines for the same gallon of water.
Distilled water is prized for its purity. The distillation process boils tap water into steam, then cools that steam back into liquid, leaving dissolved minerals and many contaminants behind. It’s a reliable way to get clean water for drinking, cooking, or specific household needs.
This guide breaks down realistic timeframes for home distillation, from the stovetop pot-and-bowl method to electric countertop units. It also covers the equipment, setup, and troubleshooting tips that help the process go smoothly, so you know exactly what to expect before you start your own batch.
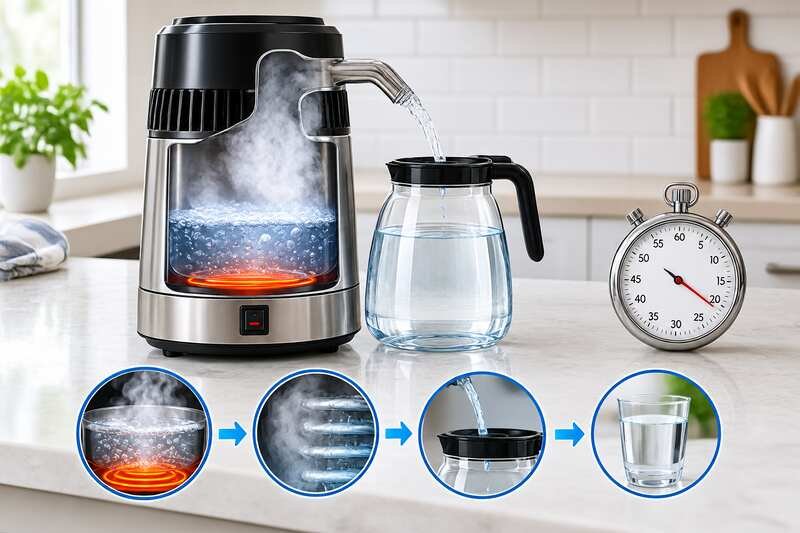

Key Takeaways
- A basic stovetop setup produces roughly one cup of distilled water per hour
- A full gallon can take 16 to 20 hours of active stovetop time, compared to 4 to 6 hours with an electric countertop distiller
- Water must reach a full rolling boil to properly separate steam from minerals and contaminants
- Replacing ice on the lid regularly speeds up condensation and shortens collection time
- Understanding realistic timelines helps you choose the right method for your needs
Understanding the Distillation Process
The science behind water distillation is simple. Tap water is heated until it turns into vapor, leaving impurities and minerals behind. That vapor is then cooled and condensed back into liquid form, producing clean water.

During this process, contaminants like heavy metals, bacteria, and many chemicals stay behind because they don’t evaporate at the same temperature as water. According to the CDC, distillation is effective against parasites, bacteria, and viruses, along with chemicals like arsenic, lead, and nitrate. That combination is part of why distillation is considered one of the more thorough home water treatment methods, and it’s a big part of why the process, done properly, takes real time rather than happening instantly.
Why the Process Takes Time
Water boils at 212°F (100°C) at sea level, turning into vapor. At this temperature, most impurities remain behind in the pot while steam rises to the lid. That steam is then collected and cooled, turning it back into liquid water.
Here’s the basic sequence:
- Water is heated to a full rolling boil, creating steam
- Minerals and impurities stay behind in the boiling vessel
- Steam rises, cools against the lid, and condenses into pure water
This sequence has to repeat continuously for as long as you want distilled water. That’s exactly why the total time depends so much on how much water you need and which equipment you’re using.
Factors That Affect Your Timeline
A few variables shift how long does it take to distill water for any given batch. Batch size is the biggest factor, since a single cup and a full gallon take very different amounts of time with the same equipment.
Your heat source matters too. A weak stovetop burner or an underpowered hot plate produces a slower, less consistent boil, which stretches out the whole process. Altitude plays a role as well, since water boils at a slightly lower temperature at higher elevations, which can slow vapor production.
Finally, how consistently you replace ice on the lid has a real effect. Letting the lid warm up between ice changes slows condensation and adds time to every batch, even when the boil itself stays steady.
Essential Tools and Materials for Home Distillation
Creating distilled water at home requires a few pieces of simple, effective equipment. Gathering everything beforehand makes the whole process faster and more predictable.
Required Equipment
You’ll need a deep, heavy-bottomed pot with a domed or invertible lid, which helps direct rising steam toward a collection point. A heat-resistant glass bowl that floats inside the pot catches the condensed water as it forms.
Ice plays a key role in speeding up condensation. Placing it on top of the inverted lid creates a strong temperature difference, which turns steam back into liquid faster and shortens your overall distillation time. A clean, airtight container is also necessary for storing the finished water.
Selecting the Best Materials
A durable pot made of stainless steel can handle sustained high heat without reacting with the water. Avoid pots that may corrode, since that can introduce new contaminants into your finished batch.
The glass collection bowl should be thick enough to resist cracking from heat, and it needs to float steadily without tipping or sinking. Using solid, well-fitted materials from the start helps you avoid slowdowns and redo work later.
How Long Does It Take to Distill Water? Realistic Timelines
This is the question most people actually want answered, and the honest response is that it depends entirely on your setup. A basic stovetop rig and an electric countertop distiller operate on very different timescales.
Stovetop Method Timing
So how long does it take to distill water with a basic stovetop setup? A simple pot-and-bowl arrangement on your stove is the slowest option, but it needs no special equipment beyond what most kitchens already have. Realistic output is about one cup of distilled water per hour, with roughly 15 to 20 percent of the water lost as steam that never gets captured. At that rate, producing a full gallon takes somewhere in the range of 16 to 20 hours of active stovetop time, according to production estimates reported by TapWaterData.
That timeline makes the stovetop method best suited to small, occasional batches rather than your household’s full daily water supply. If you only need a cup or two for a specific task, it’s a reasonable option. For anything larger, it becomes a lot of hands-on time, and it helps to plan around that reality rather than being surprised by it partway through.
Countertop Distiller Timing
If you’re weighing whether to invest in a machine, it helps to know how long does it take to distill water with an electric unit instead of a pot on the stove. An electric countertop water distiller is dramatically faster. These automated units typically produce a full gallon in about 4 to 6 hours, and they need only occasional attention rather than constant monitoring and ice replacement. Once you start a cycle, you can walk away and let the machine do the work, which makes it a better fit for households that go through distilled water regularly.
Comparing the Methods
| Method | Time per Gallon | Attention Needed |
|---|---|---|
| Stovetop pot and bowl | 16-20 active hours | Constant monitoring, frequent ice changes |
| Electric countertop distiller | 4-6 hours | Minimal, mostly hands-off |
| Store-bought distilled water | None (instant) | None, but costs more per gallon |
If cost matters as much as time in your decision, our breakdown of how much distilled water costs compares homemade batches against buying it pre-made.
Preparing Your Equipment: Setup and Safety Tips
Setting up your equipment correctly is the first step toward an efficient, safe distillation run. A little preparation up front prevents slowdowns later.
Proper Equipment Setup
Start by placing your heat-resistant glass bowl inside the pot, positioned so it floats securely without tipping. Fill the pot with water around the bowl, leaving enough headspace for steam to rise freely.
Next, invert the lid and set it on top so its domed shape directs condensation toward the bowl below. Add ice on top of the lid to speed up condensation, and plan to check and replace it regularly throughout the process.
Safety Precautions When Distilling Water
Working with boiling water calls for real caution. Always use oven mitts or heat-resistant gloves when handling hot pots and lids, and keep the setup on a stable, heat-resistant surface.
Make sure the lid fits snugly to prevent steam from escaping and slowing your progress. Avoid overfilling the pot, since that increases the risk of boiling water spilling over. Once finished, store your distilled water in a clean, airtight container to keep it pure. For guidance on how long a finished batch stays fresh, see our guide on how long distilled water lasts at home.
Monitoring and Troubleshooting Your Setup
Keeping an eye on the process helps you catch problems early and keeps your timeline on track. A few minutes of attention now and then can save you from restarting a slow or stalled batch.
What to Watch For
Watch the underside of the lid for a steady stream of condensation forming and dripping into the bowl. Irregular or sparse droplets usually mean the ice needs replacing or the boil isn’t strong enough.
Check ice levels every 15 to 20 minutes and replace melted ice promptly, since a warm lid slows condensation and stretches out your total time. If your collection bowl starts to sink or tip, reposition it so it floats freely above the waterline.
Common Problems and Fixes
A sinking or tipping collection bowl is one of the most frequent issues, and it usually means the bowl isn’t buoyant enough or isn’t centered properly. Repositioning it, or choosing a lighter, more stable bowl, generally solves the problem.
Weak or inconsistent condensation is another common issue. It’s often caused by a lid that isn’t cold enough or isn’t sealing tightly against the pot. Keeping the boil steady and the ice fresh addresses most of these slowdowns and keeps your timeline closer to the one-cup-per-hour estimate.
A boil that’s too gentle is a subtler problem worth checking for. If you’re not seeing steam collect on the lid within the first few minutes, turn up the heat until you have a true rolling boil, not just a simmer.
Alternative Methods for Producing Distilled Water
A few alternative setups can work for smaller needs or different circumstances, though they generally follow the same basic principle of boiling and condensing. Their timelines vary quite a bit from the stovetop and countertop methods above.
Bottle-to-Bottle Distillation
One simple alternative uses two glass bottles connected by a length of tubing. Steam travels from the heated bottle to the cooler collecting bottle, where it condenses into distilled water. This setup needs minimal equipment and works well for very small batches, though it shares the same general one-cup-an-hour pace as other stovetop-driven methods since it still relies on boiling and condensing over a flame.
Solar Stills
A solar still uses sunlight instead of a stovetop flame to evaporate and condense water, which makes it useful in areas without reliable electricity. It’s slower and more weather-dependent than stovetop or electric methods, often taking a full day of sunlight to produce a modest amount of water, but it requires no fuel or power source at all. For anyone asking how long does it take to distill water without any electricity or gas, a solar still is the trade-off: more patience in exchange for zero running cost.
Choosing the Right Method for Your Needs
If speed matters most and you distill water regularly, an electric countertop unit is worth the upfront cost. If you only need water occasionally and don’t mind the hands-on time, a stovetop setup or bottle-to-bottle method works fine without any investment in equipment. A solar still fits a narrower niche: off-grid situations where sunlight is plentiful but power and fuel are not.
Conclusion
Now that you know how long does it take to distill water with each common method, you can pick the setup that actually fits your schedule. A stovetop setup takes roughly one cup per hour, or 16 to 20 active hours for a full gallon. An electric countertop distiller can finish the same gallon in just 4 to 6 largely hands-off hours.
Choosing between these methods comes down to how much water you need and how much hands-on time you’re willing to spend. For occasional small batches, a pot and bowl on your stovetop works fine. For regular household use, a dedicated kettle or countertop distillation setup saves considerable time and effort.
Whichever method you choose, the core science stays the same: a full rolling boil, a cool surface for condensation, and careful monitoring are what determine both your timeline and your final water quality. Batch size, heat source, altitude, and how often you replace ice all nudge that timeline up or down.
With the right setup and a little patience, you can reliably produce clean, mineral-free water whenever you need it. Start with a small test batch to see how your particular equipment performs, then adjust your expectations for how long does it take to distill water accordingly before committing to a full gallon.


Hi, I’m Mamon, the content creator behind this blog. I share my experience in blogging, WordPress, SEO, and affiliate marketing through honest product reviews, in-depth buying guides, and practical how-to articles. Every piece of content is thoroughly researched and written to help readers make informed decisions.